
Dexterous Manipulation Capture / Original EGO R10 guide; EgoDex research reference / Sep 29, 2026
Multi-Camera Egocentric Capture for Dexterous Manipulation Training with EGO R10
Plan dexterous-manipulation demonstrations with EGO R10: synchronized multi-camera video, 1600 × 1200 at 30 fps, wide-angle views and configured IMU data.
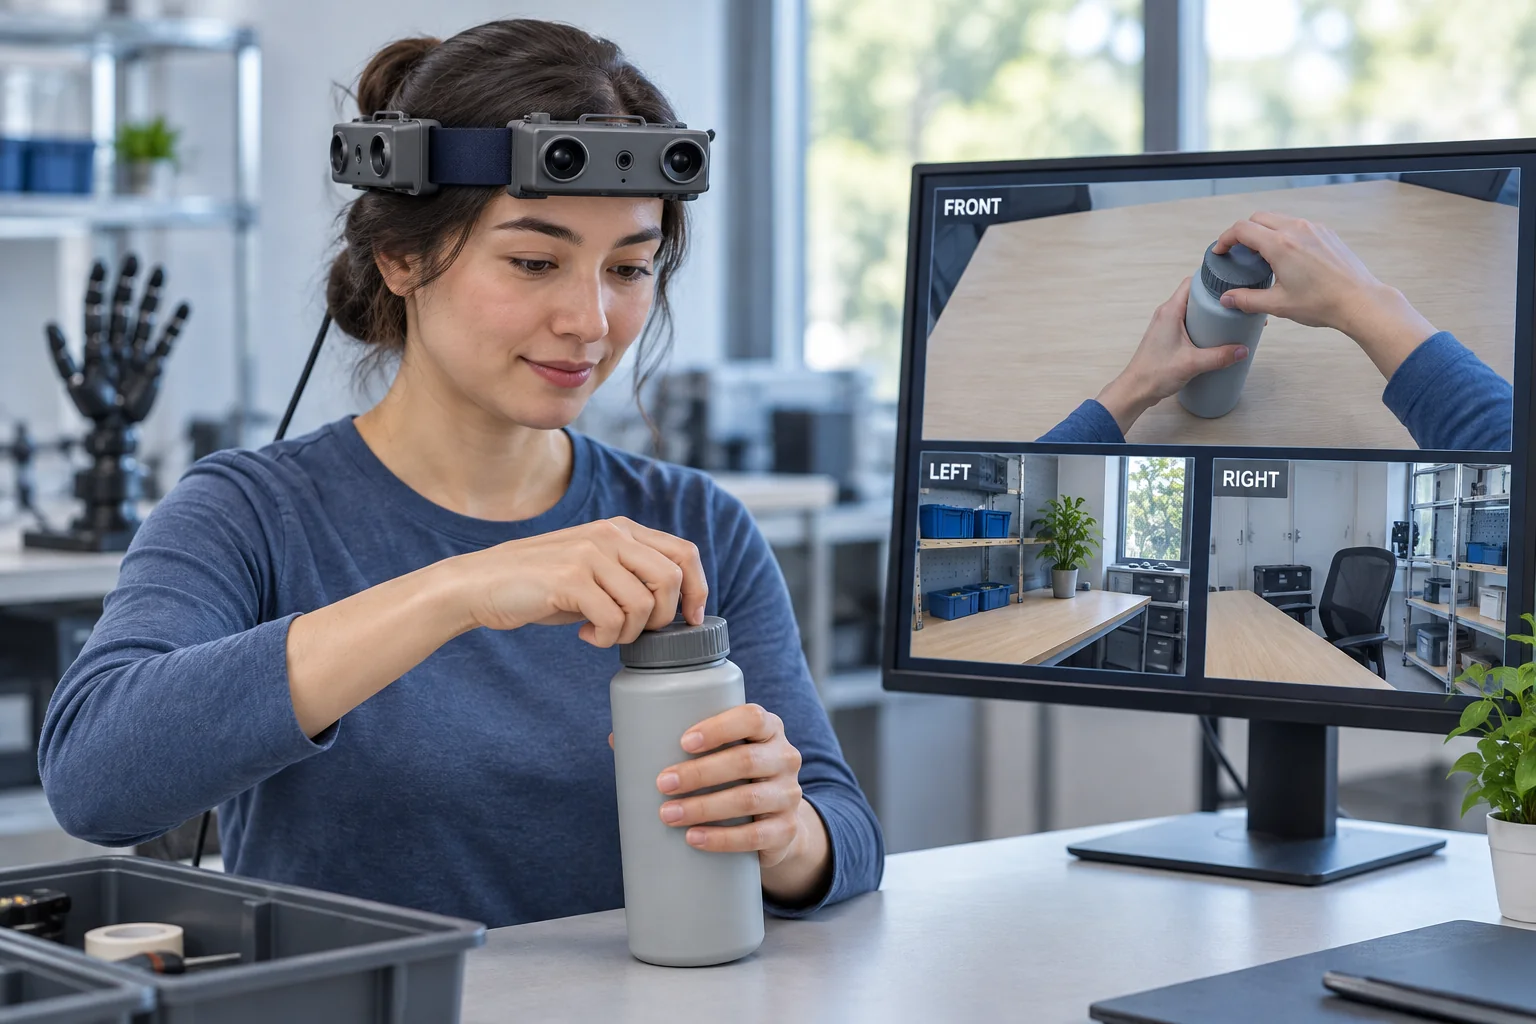
How can R10 support dexterous-manipulation data collection?
- R10 records 1600 × 1200 video at 30 fps and synchronizes its cameras to a common hardware trigger or shutter signal.
- Review the actual camera views to select visible hand-object actions and relevant surrounding workspace context.
- Record the imaging mode, USB output format and any configured 100 / 200 / 500 Hz IMU data with each session.
- Researchers define episodes, annotate visible actions and prepare the captured material for their learning experiments.
Review EGO R10 specifications and the supplied parameter tables
Dexterous manipulation demonstrations contain small but meaningful changes: fingers settle around a cap, one hand steadies the bottle, and the other turns and lifts the cap. EGO R10 can supply first-person video for a research collection built around these visible actions. Its multi-camera headband combines 1600 × 1200 imaging at 30 fps with a common hardware trigger or shutter signal. This guide proposes an R10 capture workflow for organizing hand-object interaction footage and surrounding workspace views for a dexterous-manipulation training project.
Ground the collection in documented manipulation tasks
EgoDex: Learning Dexterous Manipulation from Large-Scale Egocentric Video documents active tabletop manipulation, including unscrewing a bottle cap. Its collection process organizes recordings into episodes and associates them with task, object and environment descriptions. Those principles provide the application reference for this R10 guide. The R10 specifications below come from the supplied manufacturer tables; the research team defines the collection task, reviews the footage and performs the subsequent training work.
Define the bottle-opening demonstration
Start the R10 pilot with a plain bottle and screw cap on a worktable. Ask the demonstrator to complete the selected opening action, and record the object arrangement and task instruction. During review, a researcher can mark visible intervals such as stabilizing the bottle, gripping the cap, rotating it and lifting it clear. Keep those labels tied to the original camera file and frame interval so another reviewer can inspect the same recorded action.
Choose the task view and workspace context
R10 places camera modules around the wearer’s headband. Assign a stable identifier and orientation to each recorded view, then inspect a sample with the demonstrator in the normal working posture. Select the view that contains the hands and bottle for detailed action review. Identify what the other views actually contain, such as a side tray, nearby work surface or the surrounding room. Keep those views with the episode when they provide relevant context for the demonstration.
Preserve corresponding camera recordings
All R10 cameras are synchronized to a common hardware trigger or shutter signal. Preserve the corresponding recordings together when extracting a demonstration clip. For example, keep the view of the cap-opening action associated with the camera views covering the adjacent work area during that same interval. A researcher can then return to the relevant camera and moment when reviewing how the operator reached for, handled and set down the task objects.
Review visible detail at 1600 × 1200 and 30 fps
The R10 imaging specification lists 1600 × 1200 resolution at 30 fps. Examine a saved sample at its original resolution around changes in finger placement, cap rotation and separation from the bottle. Use the visible detail in that sample to select the working arrangement and the excerpts for annotation. Record the frame rate and any later image-processing steps with the episode, while retaining the original video for review.
Set framing with fixed-focus, wide-angle optics
R10 uses fixed-focus optics with a listed diagonal field of view of 180°, horizontal field of view of 115° and vertical field of view of 80°. Check framing while the demonstrator holds the bottle at the normal task distance, including the position where the cap is lifted and placed down. Review the relevant camera images through the entire movement. Keep the wearing position and object placement in the session notes so the collection team can reproduce the setup.
Record the lighting and imaging mode
The listed dynamic range is 61.56 dB in linear mode and 91.56 dB in HDR mode. R10 also provides automatic exposure and white-balance controls. For a bottle-opening session, inspect the cap edges, fingers and work surface under the actual room lighting, then document the image mode and settings used for collection. This makes the imaging configuration part of the record when reviewers examine clips from different sessions.
Retain motion data from the configured unit
The R10 system table specifies a 6-axis IMU in head and wrist units where required, with sampling options of 100, 200 or 500 Hz. When the selected head-unit configuration includes the IMU, save its inertial-data files under the same collection-session identifier as the camera recordings. Record the unit location and chosen sampling rate. These samples retain motion measurements from the worn unit as the demonstrator changes posture or turns within the task workspace.
Prepare USB recording and external power
R10 provides USB 2.0 connectivity and lists MJPG, H.264 and H.265 output formats. Select the recording format for the project and check that an exported sample plays correctly in the review workflow. The specification calls for an external battery, a DC 5 V supply and a maximum working current of 320 mA. Arrange the recording connection, power and cable path before the demonstration, keeping the hands and tabletop working area clear.
Organize camera files into traceable episodes
Organize each R10 episode around the original camera files, view identifiers, matching clip intervals, capture settings and any configured IMU files. Add the task instruction, object description and manually reviewed action labels. Researchers can select the views relevant to each stage and document the processing used to prepare their learning data. Dataset preparation, model training and evaluation remain explicit stages in the research team’s workflow, with each selected clip traceable to its source recording.
Plan a focused R10 collection pilot
Begin with a reviewed R10 sample before collecting a larger batch. Confirm that the relevant views show the intended action, corresponding camera recordings remain associated, and the saved files contain the planned capture settings and session references. Use this pilot to define the required view selection, video format and IMU configuration with the EGO product team. The resulting collection plan centers on documented R10 capture functions and a clearly described dexterous-manipulation task.
Research reference and R10 specifications
EgoDex — Learning Dexterous Manipulation from Large-Scale Egocentric Video
Review EGO R10 specifications and the supplied parameter tables