
3D Hand & Object Research / Original EGO R10 guide; HOT3D research reference / Oct 8, 2026
Object Reference Capture for 3D Hand–Object Tracking Research with EGO R10
Build object reference recordings with EGO R10: synchronized cameras, 1600 × 1200 at 30 fps and dual-camera calibration for hand–object tracking research.
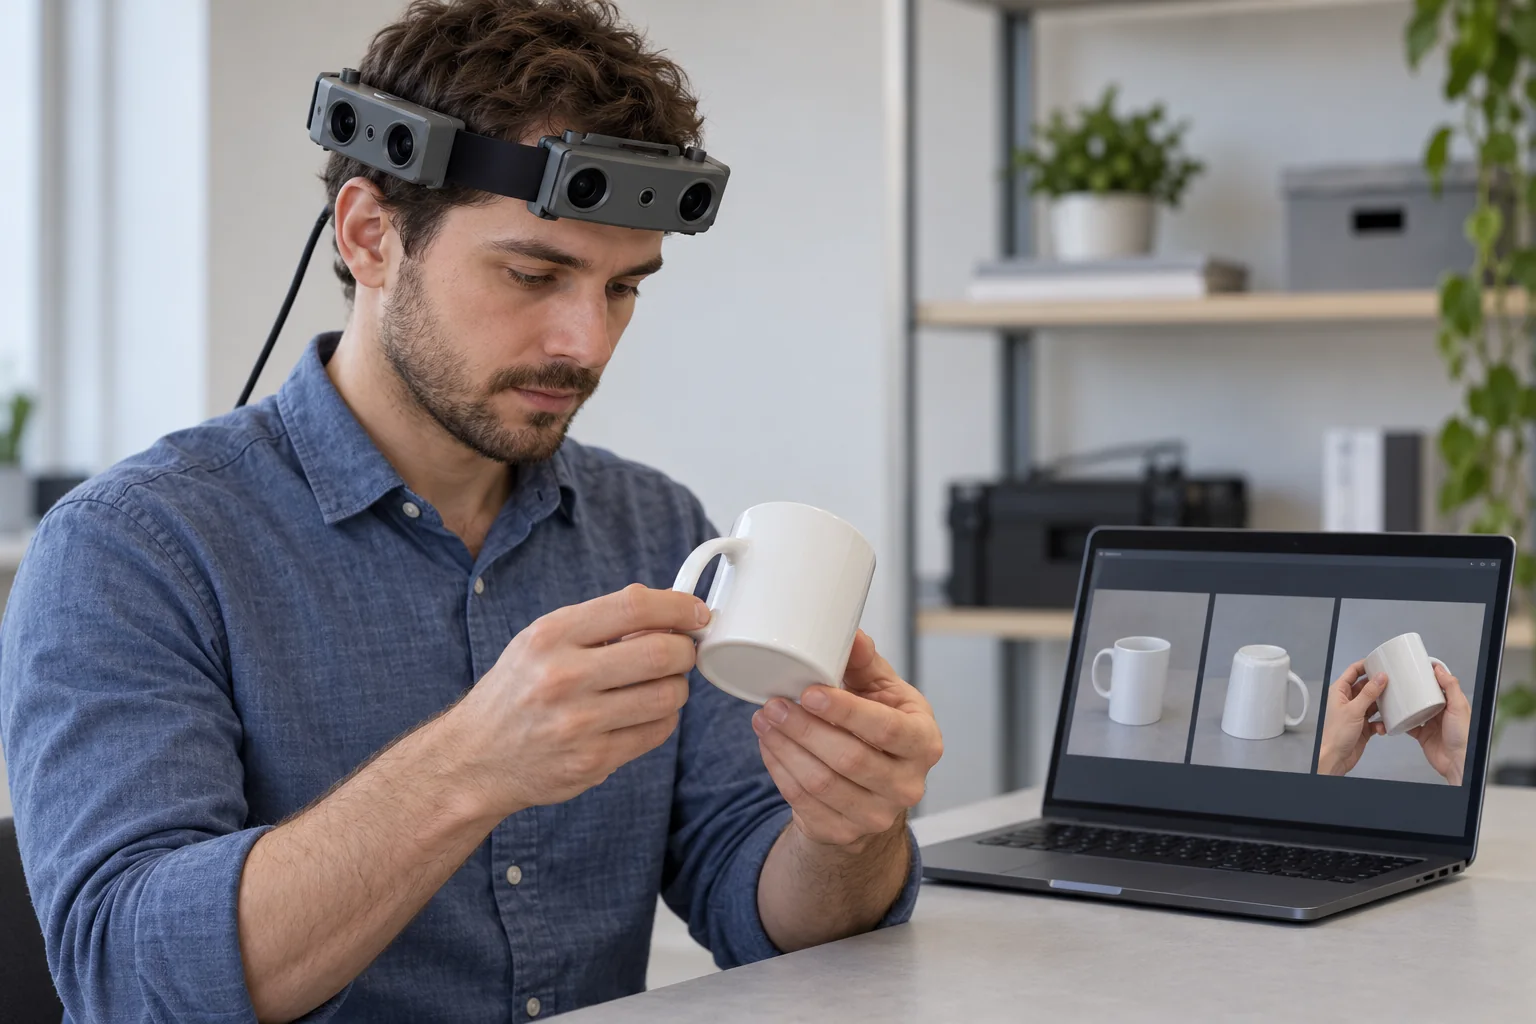
How can R10 record object references for hand–object research?
- Record stationary and hand-held views of the same object, following a defined tabletop collection plan.
- Retain corresponding R10 camera recordings using the documented common hardware trigger or shutter signal.
- Review object detail at 1600 × 1200 and 30 fps, with the fixed-focus lens framing checked in the actual setup.
- Associate selected frames, camera-pair calibration and researcher-created annotations with one object identifier.
EGO R10 can provide synchronized camera recordings for a research team building visual references of hand-held objects. In a 3D hand–object tracking project, an object reference records appearance from several positions before researchers analyze the interaction footage. This proposed R10 workflow concentrates on a tabletop reference collection: first record a stationary object, then record it being turned in the hands. R10 supplies the image acquisition; the research team selects frames, prepares annotations and performs its subsequent tracking analysis.
A research basis for object reference capture
HOT3D, presented by Prithviraj Banerjee and colleagues at CVPR 2025, includes reference recordings for introducing objects to tracking and reconstruction research. Its collection describes two arrangements: an object resting on a desk in upright and inverted positions, and an object manipulated by hand. This provides a specific application for an R10 pilot. Use those two recording arrangements to build an object-centered reference set, with the R10 configuration documented alongside the images.
Record the stationary object from several positions
Begin with one empty mug on a clear tabletop and assign it a research identifier. Wearing R10, record the mug while changing viewing position around the table. Make another recording with the mug placed upside-down. Keep each stationary arrangement under its own take identifier. During review, select R10 frames showing the handle, rim, outer surface and base. Attach a short description of the visible surface to each selected frame so the reference set can be reviewed systematically.
Add a hand-held reference sequence
Next, use R10 to record the same mug being lifted, turned and placed down. Change the grip to reveal portions of the surface previously covered by the fingers, keeping the action within the inspected camera view. A reviewer can select intervals showing the mug’s appearance and the changing hand contact. Label the take as a hand-held sequence and link it to the same object identifier as the stationary recordings. These links keep the reference photographs and interaction footage organized around one physical object.
Preserve the relationship between R10 camera views
R10 synchronizes all cameras to a common hardware trigger or shutter signal. Retain the corresponding camera recordings together when selecting a moment from the mug-turning sequence. Give every view a stable identifier and inspect which images contain the mug and fingers. The headband’s other camera views may contain the adjacent tabletop or room; describe their actual content when deciding which views to include in the object reference. Keep the selected frame interval and camera identity with every exported image.
Check reference detail at the recorded resolution
R10 specifies 1600 × 1200 resolution at 30 fps and fixed-focus lenses. Its listed field of view is 180° diagonal, 115° horizontal and 80° vertical. Before collecting the full set, replay a sample at its original size and inspect the mug’s rim, handle opening and finger boundaries. Use that sample to choose the wearing position and object distance for the session. Include the upright, inverted and hand-held arrangements in this framing check, then retain the selected setup in the collection notes.
Associate calibration with the selected camera pair
Dual-camera calibration is one of R10’s documented functions. For the research team’s geometric processing, identify the camera pair being used and keep its calibration record associated with the matching reference footage. If the team crops or resizes an image, document that transformation together with its original frame dimensions. This gives later processing a traceable connection between an object image, the camera that recorded it and the calibration used in that experiment.
Keep the reference images tied to the source video
R10 offers USB 2.0 connectivity and lists MJPG, H.264 and H.265 output formats. Select the capture format, save a short recording and verify playback before the tabletop session. Preserve the original video when exporting reference photographs, and record the decoding and frame-selection settings. R10 specifies external-battery power, DC 5 V input and a maximum working current of 320 mA. Prepare that recording and power arrangement so the wearer can complete the planned object views at the table.
Build an object-centered review index
A useful R10 reference index starts with the object identifier and lists the stationary-upright, stationary-inverted and hand-held takes beneath it. For each chosen image, add its camera identifier, source frame, visible surface and the reviewer’s observation about hand coverage. Inspect this index against the saved images before proceeding. If a surface needs another view, record a new take and retain its source link. Researchers can then locate the exact R10 observation used when preparing an object reference or a hand–object annotation.
Use the R10 collection in a documented research workflow
The research team can prepare visible hand and object annotations from the selected R10 images and use the reference set in its chosen tracking study. Keep the annotation version and processing settings attached to the input files, and associate later analysis with those same identifiers. Begin with one reviewed object collection before expanding the inventory. When discussing R10 evaluation with the EGO team, specify the selected camera views, 1600 × 1200 at 30 fps, recording format and calibration requirements for this tabletop workflow.
Research reference and R10 specifications
HOT3D — hand and object tracking research and object reference sequences